How to Transfer Shares From Another Demat Account to Dhan?
- Last Updated: 16 Jul, 2024
- Value Broking
- Mins
- 1.3K

Here’s a step-by-step guide on transferring your shares from your current broker to the Dhan platform :
Steps to transfer shares from another Demat account to Dhan
| Steps | Description |
| 1 | Log in to CDSL Easiest |
| 2 | Choose 'Setup' from the 'Transaction' area. |
| 3 | Click on 'Bulk Setup'. |
| 4 | Choose 'Transaction,' and enter the beneficiary owner ID with the execution date. |
| 5 | Click Account ISINs to view the ISIN data. Click 'Submit.' Confirm your request. |
| 6 | Select 'Verify.' and 'Commit’. |
| 7 | Type in the CDSL Easiest PIN. |
How do I transfer shares from another Demat account to Dhan?
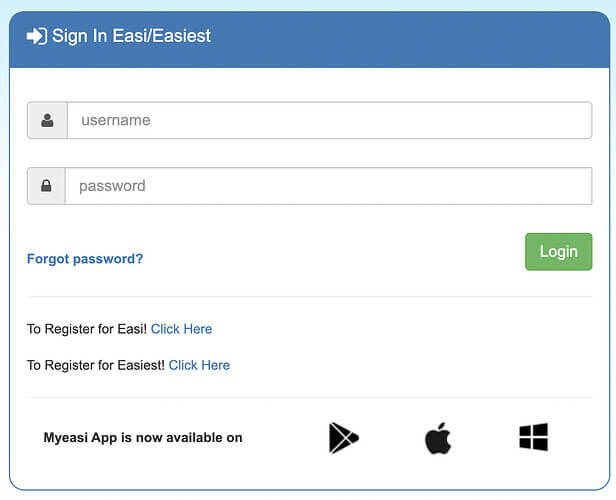
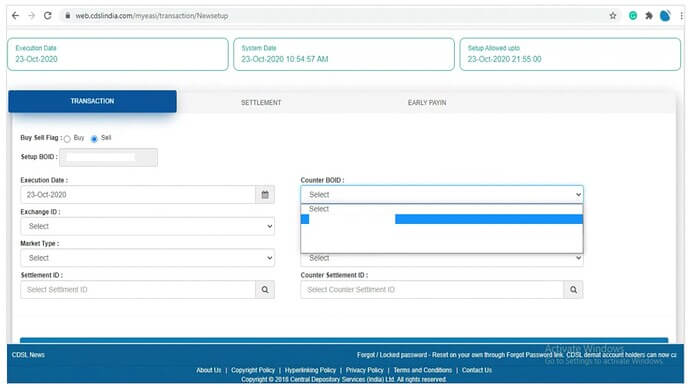
Step 1: Log in to CDSL Easiest on the website.
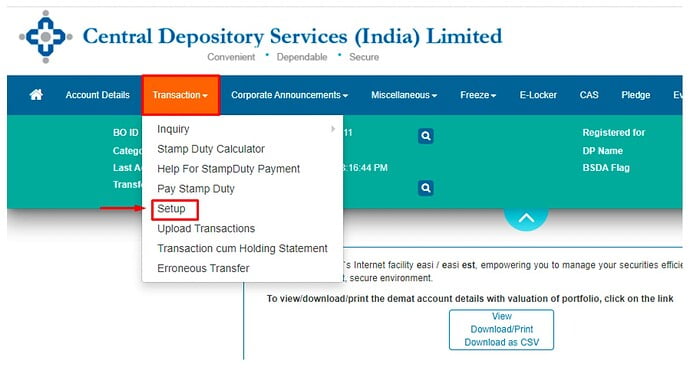
Step 2: Choose 'Setup' after logging in from the 'Transaction' area.
Step 3: Click on 'Bulk Setup'.
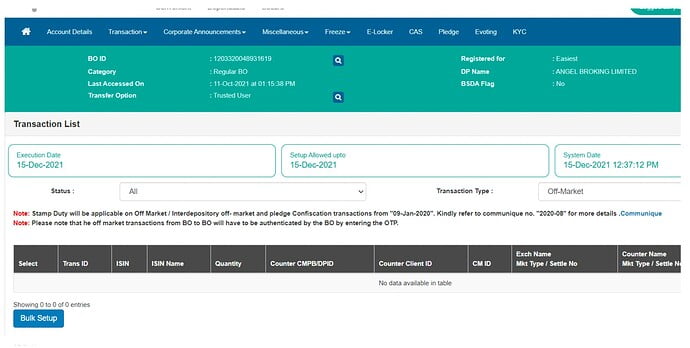
Step 4: Choose 'Transaction,' then enter the beneficiary owner ID (BOID) to whom the shares must be transferred and the execution date.
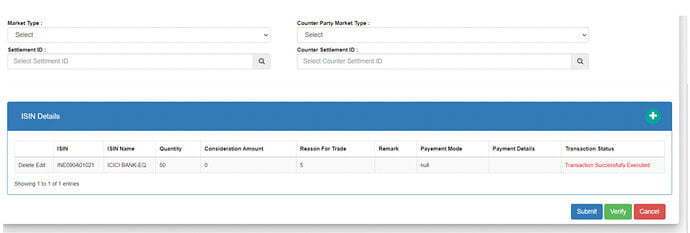
Step 5: To view a list of every ISIN in your holdings, click Account ISINs.
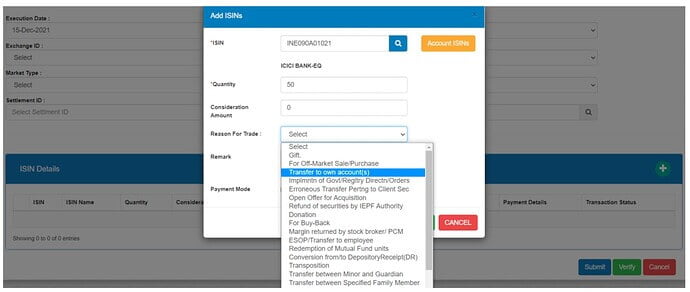
Step 6: Click the ‘Account ISINs’ link to view the ISIN data. To set up, you must now click 'Submit.'
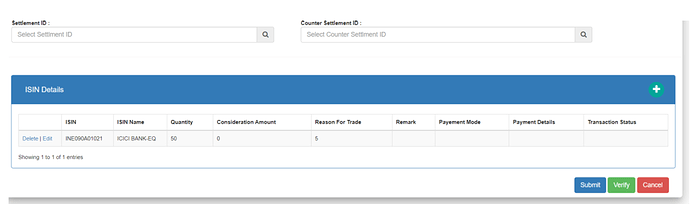
Step 7: You will receive this notice after submitting. You must then confirm your request.
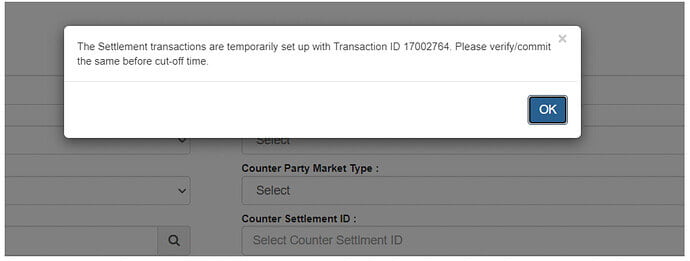
Step 8: Select 'Verify.'
Step 9: Select 'Commit.'
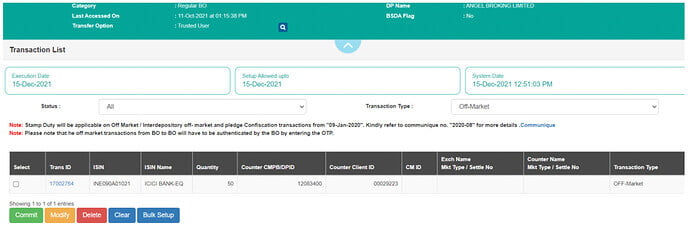
Step 10: Type in the CDSL Easiest PIN.
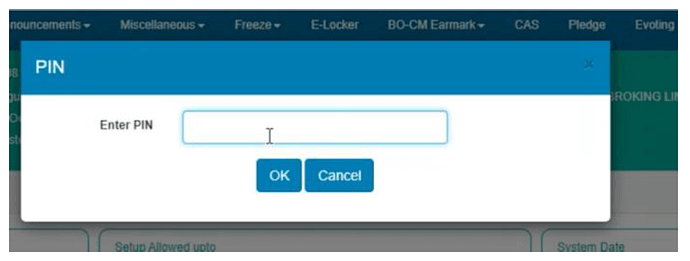
You've completed your share transfer request with this last step.